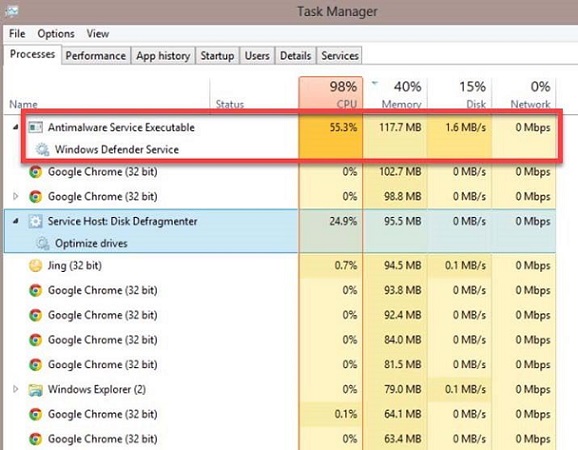
The name of the process MsMpEng (MsMpEng.exe) utilized by the Windows Defender application is Antimalware Service Executable. The Windows Defender Service is the service-connected with this program. The two most typical causes of high CPU consumption are the real-time feature.
It constantly scans files, connections. The other is associated apps in real-time, evidently designed to protect in real-time. This process enables Windows Defender to scan the computer for potential threats. Additionally, it provides real-time protection against malware and cyberattacks.
At the same time, it can be the source of unreasonably high CPU utilization. Another Windows Defender function known as Full Scan could be slowing down your system. It does a thorough examination of all files on your computer.
Full Scan feature relies majorly on the CPU and will consume whatever assets your system has available; as a result, it may encounter disruptions. You can expect lags, hanging, and delayed access/response from your input/interactions with the system.
The reason is the Hijacking of the CPU by Defender. Commonly antivirus programs consume excessive CPU; Windows Defender scans the deepest pockets and uses the most among all.
It may take a few minutes to a few hours, but the key here is patience and not being afraid. For your protection, let is finish, and once that happens, the USAGE will drop down to normal.
Read Also:
Contents
How To Fix High CPU Usage By Antimalware Service Executable (MsMpEng)?
In this article, you will find some of the quick and best methods to fix this:
Method 1: Reschedule Windows Defender Properly
Many Windows users who have reported significant CPU consumption by MsMpEng.exe indicate it happens during a comprehensive system scan. To resolve these concerns, you can reschedule the scan at a time when you are not using your computer:
To do so-
Step 1: First, click on the Start Menu and open Administrative Tools.
Step 2: Further open Task Scheduler. Next, open the Task Scheduler Library in the left navigation pane.
Step 3: Expand these folders further and travel to the following location:
/Microsoft/Windows/Windows Defender.
Step 4: Next, browse Windows Defender Scheduled Scan and select Properties.
Step 5: Uncheck the Run with Highest Privileges option under the General tab.
Step 6: After, click on the Conditions tab in the Properties window, uncheck the items under Idle, Power, and Network, and click OK.
We will schedule it correctly in the coming steps.
Step7: Finally, we reschedule it. To do so, open Windows Defender Scheduled Scan, navigate to the Triggers tab, and then click New.
Here, choose Weekly or Monthly, depending on your comfort, and then select the Day. Click OK and confirm that it is enabled. As a recommendation, choose a time where the user won’t be attentive to CPU usage.
Method 2: Turning Off Windows Defender
Disabling Windows Defender can assist in resolving this issue, as this was the only solution that worked for many people. When employing this strategy, keep in mind that another antivirus will almost certainly require less CPU time than Windows Defender.
There are two methods of performing this process. The first is by using the Local Group Policy Editor. Keep in mind that this only works on Windows 10 Enterprise and Pro editions.
Additionally, this also works for more advanced versions of previous operating systems. If the first option does not work, we use the Registry Tweak mentioned below.
2.1 Using Local Group Policy Editor
Step 1: Begin opening the Local Group Policy Editor, press Windows Key + R, type gpedit.msc in the Run dialogue box, and click OK.
Step 2: After,browse to Computer Configuration > Administrative Templates > Windows Components > Windows Defender in the Local Group Policy Editor folder.
Step 3: Next, open the Turn off Windows Defender setting in this Group Policy. To disable Windows Defender, check the Enabled box. Then, click Apply, followed by OK.
Step 4: Windows Defender should turn off immediately. If it doesn’t work, restart the computer and check to see if it’s turned off.
2.2 Using The Registry
Step 1: Launch the Run Dialog Box by pressing Windows Key + R.
Step 2: Next, open the Registry Editor, type regedit in the Run Dialog Box, and press OK.
Step 3: Further open the folders in the left navigation pane to navigate HKEY_LOCAL_MACHINE\SOFTWARE\Policies\Microsoft Windows Defender.
Step 4: If you find a registry entry called DisableAntiSpyware, double-click it and change the value data to 1.
Note: If you don’t see a DisableAntiSpyware registry entry, right-click in the main Registry Editor pane and choose New > DWORD (32 bit) Value.
Give this new registry entry thename DisableAntiSpyware. Similarly, change the value data to 1 (Double-Click).
Method 3: Adding Antimalware Service Executable to Windows Defender Exclusion List
Windows Defender scans every file on your computer, including itself, throughout its scans. It can result in unexpected interactions occasionally and become a common source of lag. To circumvent this, command Windows Defender to skip itself while doing a system scan.
Including MsMpEng.exe in an exclusion list significantly reduces CPU utilization.
Step 1: Open Windows Task Manager by pressing Ctrl + ALT + Del on your keyboard. Check for the Antimalware Service Executable process in the list.
Step 2: Next, right-click on Antimalware Service Executable and select “Open File Location.” It highlights the file MsMpEng. Copy the location of this file path by clicking on the address bar.
Step 3: Further, hold the Windows Key and press I, then select Update and Security
Step 4: After, open Windows Defender from the left pane, scroll down until you reach “Exclusions,” then click Add or delete exclusions.
Step 5: Finally, on the next screen, select the folder and paste the path of Antimalware Service Executable (MsMpEng.exe) into the address bar.
Last, click Open, and it would resolve the issue.
Method 4: Scan For Malware
Anti-malware software battles threats. “Malware” is given to these threats, an abbreviation of Malicious software. Malware is malicious computer software. It infiltrates the computer invisibly. Installation usually happens via a bogus download, a phishing email, or an infected attachment.
Because malware masquerades as a legitimate program, many consumers are unaware that the programs they have downloaded contain malware. Malware, once installed, can affect the computer in a variety of ways.
It can adjust computer settings, erase valuables, and destroy computer data. Malware also allows hackers to access the computer without being detected. The hacker can then gain control of the computer and potentially use it to commit cybercrime without the user’s awareness.
If you observe MsMpEng.exe taking a lot of computer resources, there might be a chance of a virus or malware infestation. Because it is a .exe executable file, it is subject to malware and virus attacks.
Malware is likely to have infected the MsMpEng.exe process. Scan your PC using an anti-malware solution to detect and remove any malware that may be present.
Method 5: Removing Bad Updates
There has been a vast history of faulty updates, ranging from introducing even more flaws to causing the new version to grind your machine to a halt due to inefficient resource allocation techniques.
When Windows Defender receives incorrect definition updates, it incorrectly classifies a few Windows files as viruses. In this step, we will remove these updates with Command Prompt. Steps for performing the task:
Step 1: First, open the run prompt, press the “Windows” + “R” keys.
Step 2: Second, to grant administrative rights to the command prompt, type “cmd” and simultaneously press “Shift” + “Ctrl” + “Enter.”
Step 3: In the prompt, select “yes.”
Step 4: Enter”%PROGRAMFILES%Windows DefenderMPCMDRUN.exe” -RemoveDefinitions -All” and click “Enter.”
Remember to keep the commas in the command.
Step 5: Next, type “% PROGRAMFILES% Windows DefenderMPCMDRUN.exe” -SignatureUpdate and click “Enter.”
Step 6: Wait for the process to finish before checking to see if the problem persists.
Read Also:
Conclusion
Go through the complete article to find the best-suited solution to your problem. These are the most effective and easy methods that can solve the problem of High CPU Usage By Antimalware Service Executable (MsMpEng).
If one solution does not work out fine, you can always try the other method. Make sure you follow all the steps carefully to attain desirable results.


