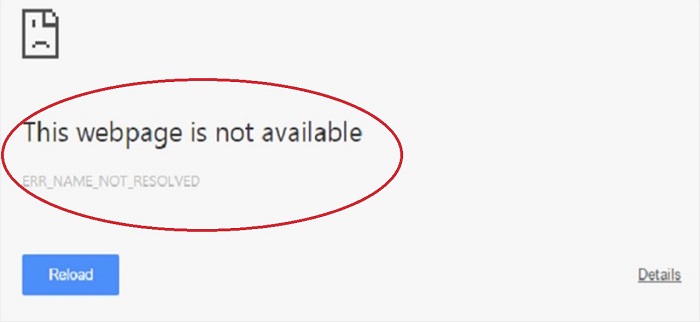
ERR_NAME_NOT_RESOLVED is an error that you might see in your Google Chrome browser while surfing over the internet, loading a website, and then the site fails to load, and then this error is displayed on your screen. ERR_NAME_NOT_RESOLVED error means that the domain name cannot be fixed, which is set by DNS (Domain Name System). As we know every domain has its name server, with which DNS fixes these domain names.
So, when you see the error ERR_NAME_NOT_RESOLVED, it means that the domain name is not resolved. Several reasons can cause ERR_NAME_NOT_RESOLVED error. The configuration of your system might be at fault, or the configurations of your router can be inappropriate, or the website you are trying to reach might have some errors or might be down.
Contents
How to Fix ERR_NAME_NOT_RESOLVED Error
So, you see there can be many reasons for ERR_NAME_NOT_RESOLVED error to occur but have got you some of the best solutions to fix ERR_NAME_NOT_RESOLVED error. Given below, are four fixes for ERR_NAME_NOT_RESOLVED error. You can follow any one of them as per your convenience. If one of them won’t help you fix the error, then you can try out the rest of the solutions.
Method 1 – The Site You Are Trying to Access is Your Website, and It Returns ERR_NAME_NOT_RESOLVED
Setting up a website and bringing it on the main platform involves, hosting your website. This hosting can be free of cost or can be provided by some hosting providers, who sell these hosting. Now once you get your hosting, you are also provided with the name servers, that must be updated with the Domain Register. For example, xyz.com is registered with ABC website and is hosted by provider1, provider2, provider3. If you are registered with any website (ABC website in the above example), then that website updates the name servers with the Domain Register, and you are not required to do it manually.
So, this is the hotspot; this is the part you just be careful. You must check whether the name server you have is updated with the name servers provided to you. You can make this thing sure by just visiting intodns.com/. If in case you can load the other websites but cannot load your own website, then you must see its nslookup report. All you have to do is to open the Command prompt by pressing the Windows key along with the R key to open the Run Dialog box and then in the search bar type cmd and press the enter key; this takes you to the command prompt. Now in the command prompt type- “nslookup,” and hit the enter key.
If this shows you a valid IP address, then your domain exists, but if no valid address is shown, then your domain doesn’t exist or has some other issues.
Read More:
- Microsoft Compatibility Telemetry High Disk Usage in Windows 10
- No Sound Output Device Installed Error in Computer
- Error Code: 0x80070005 – Windows 10 Update Error
- VAC Was Unable to Verify the Game Session in CS:GO
- DNS_Probe_Finished_No_Internet Error in Google Chrome
Method 2 – If You’re Trying to Access A Site Which Is A Normal Site, And it’s Accessible Everywhere But Not In Your Device
The site you are trying to access is a general site, that is accessible everywhere else but not just on your Device, then it is obvious that the server of the website you are trying to reach is not at fault. So, where does the fault lies?
Yes, its your system which is at fault, to be precise your system’s settings are at fault as they might have been misconfigured. The most probable cause of this error in such circumstances is that your ISP’s DNS servers are down or your DNS settings are at fault, due to misconfiguration. Now to fix this issue, we will take help from Google as it provides public DNS servers with 99.99% uptime.
Open the Run dialog box by pressing the Windows key along with the R key. Now type “ncpa.cpl” and click on “Ok.” Next, look for your Network Adapter and open its properties, by right-clicking on it and then selecting “Properties.”
Now, you will have to select Internet Protocol Version 4 (TCP/IP4), and then select properties. Now click on the checkbox on the left of “Use the Following DNS Server Address.” Now update the two fields of the address-
8.8.8.8
8.8.4.4
Next, click on “OK,” followed by “Test.”
Method 3 – Updating Your DNS on a MAC OS X
On a Mac OS X environment, on the top left corner of the screen, you will have to click on the Apple icon. Then, click on System preferences. Click on the Network icon and check whether your active adapter, be it wireless or ethernet is active and selected or not, and then click on Advanced.
Now amongst “TCP/IP, DNS, WINS, 802.1X, Proxies, Hardware” tabs, select the DNS tab, and look for the “+” symbol and click on it. Given below are the DNS that you must add, and delete the previous ones if they exist.
8.8.8.8
8.8.4.4
Method 3 – Clear Google Chrome’s Host Cache and Disable Predict Network Actions
Following are the steps to clear Google Chrome’s host cache and disable predict network actions:
Step 1: Firstly, open the Google Chrome browser and open its Settings, and then click on Show Advanced Settings.
Step 2: Secondly, open Privacy.
Step 3: Thirdly, look for- “Predict network actions to improve page load performance or use a prediction service to load pages more quickly” and disable it immediately.
Step 4: Now type the following in the address bar:
chrome://net-internals/#dns
and hit the enter key.
Step 5: Look for Clear Host Cache and click on it.
These steps should most likely fix all your issues.
Must Check Out:
- Err_Connection_Reset Error in Google Chrome
- ERR_CONNECTION_TIMED_OUT Error in Chrome
- Windows Update Error 0x800705b4
- Application Error 0xc0000142
Conclusion
With this, we come to the final words of our article. We understand the value of your time and the difficulties you have to go through while facing these errors. They act as an unavoidable obstacle in the middle of your work; hence, we provide you with the best ways to fix them and make sure we help you with the best of our abilities.
We have provided you with some of the best methods to resolve your problem, including the different types of reasons for the occurrence of this error. Hopefully, our solutions to this issue will help you to the best of your satisfaction.


