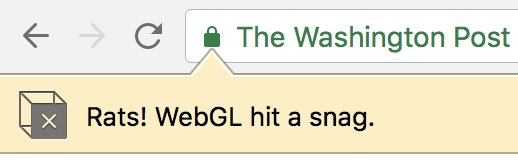
Most of the users have encountered an error message while using Google chrome which reads as “Rats! WebGL hit a snag“. When users are browsing through certain sites that are involved in heavy script usage they may come across this type of error. Before rushing to find a solution you need to know what WebGL (Web Graphics Library) actually means.
Well, it is a JavaScript API that is used for rendering interactive 2D and 3D graphics. For example, using Google Maps in Google Chrome without plug-ins. In simpler words, WebGL hit a snag means that the capacity of Google Chrome to handle the CPU and Graphics power is reached to its maximum level.
Moreover, Rats! WebGL Hit a Snag error is a disadvantage to many users as they won’t be able to access certain sites because something is stopping WebGL from accessing your system/mobile’s Graphics card.
Even if the user tries to reload the page to get rid of the error, it doesn’t disappear. Instead, it reappears when the same website is attempting to use the web graphics library. This error is the main reason as to why some of the users had to stop using chrome and switch to other browsers like Mozilla and Opera.
Contents
How to Fix Rats! WebGL Hit a Snag Error on Google Chrome
If you have been facing this issue lately, follow the instructions thoroughly to resolve the error and continue with smooth browsing:
Method 1 – Clear Cache and Cookies
Clearing excess cache and cookies have been proven to produce extreme results to solve WebGL hit a snag issue. So we recommend you to follow each instruction of this method carefully and find a solution.
Step 1: Firstly clear the browsing data in chrome by selecting three vertical dots on the top right corner of your browser. Choose settings from the dropdown menu listed.
Step 2: Now click on the “More tools” option and then clear browsing data. We recommend you choose the time range as the “All Time” option so that all the data has been cleared. We recommend you to clear cache and cookies.
Step 3: Continuing which restart the computer later to apply the changes. Make sure to unplug your DSL Internet cable or turn your WiFi adapter on and off before proceeding.
Hopefully, this should clear out the WebGL Hit a Snag error. Restart the computer and check.
Method 2 – Switch Hardware Acceleration Off
The mostly encountered problem that is associated with WebGL Hit a Snag error is Hardware Acceleration. Turning off this particular option is one of the best solutions to resolve the error.
Step 1: Launch the Google Chrome browser from your system device.
Step 2: Now click on the Customize and control Google Chrome button which is a three-dot icon found in the top right corner of the browser.
Step 3: Further from the dropdown menu, locate settings option and click on it or you can open a new tab in chrome and type chrome://settings to do the same.
Step 4: Scroll down the dropdown menu to the field which displays the “Show Advanced Settings” option.
Step 5: Finally scroll further down the page you have got and unselect the toggle switch next to “Use hardware acceleration when available” to disable it. In case this option is already turned off by default, you can try enabling it and check if it solves the issue.
Method 3 – Update your GPU Driver
WebGL plays a very crucial role in displaying the sites which you are browsing. WebGL uses your GPU processing power to increase the performance of a few web pages. Along with that to render certain images and videos, its performance greatly depends on your graphics video driver. This is the reason why it is very important to update your driver so that you can fix Rats! WebGL Hit a Snag error from your system permanently.
Step 1: In your PC click start Menu present at the bottom left corner of your system. Now type Run and select it. In simpler ways, press Windows + R key from the keyboard to do the same.
Step 2: A dialog box is visible to you now. Type the command “devmgmt.msc” in the Run dialog box and select OK. This command instructs the system to open the Device Manager Window.
Step 3: Now a list of options is visible to the user. Locate your graphics card from then by going through the Display adapters section. Click on the arrow located on the left side of this section and view the list of Display adapter drivers available.
Step 4: Then you can right-click on the adapter of your graphics card. Select the Update driver option from the context menu. If your system uses an integrated graphics card, there will be only one item on the list.
Step 5: System displays choices for you. Select Search automatically for updated driver software. Windows will search and install drivers for you.
Step 6: Restart your system to apply the changes.
Method 4 – Disable WebGL
Disabling WebGL from Google Chrome Browser settings is one of the prominent solutions to remove WebGL Hit a Snag error. Before proceeding further I would like to inform you that as few sites which use WebGL might not load as faster as they used to before because WebGL was usually using your graphics processing power to load them faster.
Step 1: Open a new tab in your Google Chrome Browser and type chrome://flags in the address bar. Now press enter to open this area of chrome.
Step 2: Now at the top of the flags page in Chrome you will find a search bar, type the keyword WebGL in the search bar. This window will lead you to an option namely Disable WebGL. Click on it.
Step 3: Restart the browser to apply changes.
Also Read:
- Widevine Content Decryption Module
- ERR_QUIC_PROTOCOL_ERROR
- Error Loading Player: No Playable Sources Found
- Your Connection is Not Private
Conclusion
Hoping you would have resolved Rats! WebGL Hit a Snag issue by now and browsing the sites of your choice without hindrance. If you still haven’t found an effective solution even after applying these methods make sure you visit the site of the manufacturer who made the graphics card of your system and downloads the latest driver for your graphics card.
")


