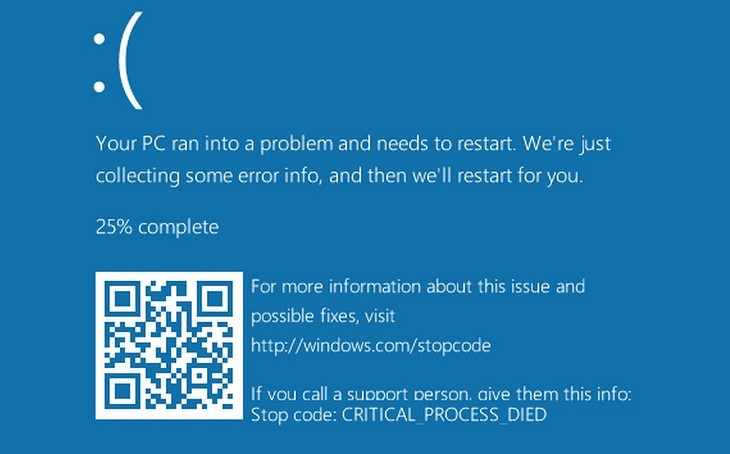
Users of Windows 8 and Windows 10 have recently received this Critical Process Died error on their computer screens. The trustworthy and amazing feature of the Windows Operating System is that it makes sure only authorized applications can access specific data and parts of your system.
Critical Process Died error occurs when unauthorized access has been made or when any component of the Windows System fails to detect unauthorized modification to its data and stops running correctly, leading to the crashing of your system.
Contents
Why Does Critical Process Died Error Occur?
This Critical Process Died gives a severe problem for you, which results in BSOD that is the Blue screen of Death. It appears due to different software and hardware problem. This BSOD causes many problems as it doesn’t allow you to perform anything on your computer.
Read Also:
According to the Microsoft Forum says that “If the processor is unable to process these multiple processes correctly, it generates the Critical Process Died error.”
How to Fix Critical Process Died Error in Windows 10
Method 1: Uninstall Latest Updates
When you download new software, make sure it is not corrupted. Because usually many errors occur due to virus coming along with the new downloads. Users have reported that the upgraded version of Windows 10 has arrived with a critical process that died error on their computer.
And in case the error occurs, go for an anti-virus scan on your computer and remove the files affected by it. To uninstall the latest updates on your PC following the steps:
Step 1: Navigate to the Settings, and then click on Windows Update.
Step 2: Choose the Update History option.
Step 3: Now, click on Uninstall Updates and choose the Updates you would like to uninstall, and click Uninstall.
Method 2: Disable Sleep Mode and Hibernate
Step 1: Go and open the Control panel and type Power options in the search bar.
Step 2: In the Power options, click on “change what the power button do“.
Step 3: Now, click on Change settings that are currently unavailable.
Step 4: Then, uncheck the Sleep and Hibernate options.
Step 5: Lastly, save it and restart your computer.
Method 3: Run System File Checker
As you all know that SFC as System File Checker is used for checking the corrupted files or missing files. It works very efficiently and checks your system if it has any errors and rectifies it. It also has a backup process through which it can get those missing files.
Follow the steps to run the SFC process:
Step 1: Go to the Start button and search for the command prompt. Then Right-click on the command prompt and choose the option Run as administrator.
Command prompt window will open up in administrator mode.
Step 2: Type sfc /scannow command and press Enter. The scanning will take some time. Be patient and do not interrupt it in between.
Step 3: After complete scanning, you will receive either of the two notification:
If there are no corrupted files in your system, then Windows Resource Protection did not find any integrity violations that will pop up.
If corrupted files are present, then Windows Resource Protection found corrupt files and successfully repaired them.
Step 4: Restart your computer now.
Method 4: Run DISM
Deployment Image Servicing and Management, known as DISM, will help you to get over critical processes died issue. Just follow the steps.
Step 1: Go to the Start button and search for the command prompt. Then Right-click on the command prompt and choose the option Run as administrator.
Command prompt window will open up in administrator mode.
Step 2: Type these commands one after the other and press Enter.
DISM /Online /Cleanup-Image/CheckHealth
DISM/ Online /Cleanup-Image /ScanHealth
DISM /Online /Cleanup-Image / RestoreHealth
Step 3: Wait till the process is completed and then restart your computer.
Method 5: Run CCleaner and Antimalware
Step 1: Download and install CCleaner and Malwarebytes.
Step 2: By running Malwarebytes, it will scan your system to find out the corrupt files.
Step 3: If it found malware, then it automatically removes it.
Step 4: Then, Run CCleaner and Tick right on all the selections to get it cleaned.
Step 5: Click on Run Cleaner and wait till it is done.
Step 6: Go and click on the Registry tab now and again click on all the selections and make sure they are checked.
Step 7: Now, Select the Scan for issue option and let the CCleaner scan, and after this, click on Fix Selected Issues. Then choose Yes, when a window appears.
Step 8: When the backup is done, select Fix All Selected Issues.
Step 9: Finally, restart your computer.
Method 6: Clean Boot or Enter Safe Mode
Step 1: Press Windows + R to open the run command box. Then type msconfig in the box and press Enter.
Step 2: Services window will open up. Then click on Hide all Microsoft services and then click on the Disable for all options.
Step 3: Click on the Startup tab and choose Open Task Manager.
Step 4: Select each item from the list and click on it and disable it.
Step 5: Close the Task Manager, then click on OK to reboot your system.
To enter a safe mode follow the given steps:
Step 1: Boot a couple of times until there appears a list of three booting options.
Step 2: Click on Troubleshoot to see advanced options.
Step 3: Then, select Advanced options.
Step 4: Select the Startup Settings.
Step 5: Now, click on the restart button and select the Enable safe mode option.
Method 7: Restore Your System
Restore system is the best method as it removes all the recently installed apps and programs that may have caused this problem. It gives you the benefit of coming back to the earlier performance of your system without affecting or harming any files and data.
If you have already created a restore point then you won’t be able to perform the restore process. Follow the steps to perform the restore process system.
Step 1: Go to the Settings option and choose Update and Security.
Step 2: Then go and click on Recovery displayed on the left panel.
Step 3: Now, click on Get Started with Reset the PC option.
Step 4: Click on the option of keeping all your files.
Step 5: Follow all the instructions to complete the restore process.
Method 8: Update the Latest Drivers
Sometimes due to outdated drivers, critical died error occurs. Drivers are unable to adapt to the changes happening in the system. The best solution is to update your drivers for efficient flow. Updating will help you get rid of the critical died error.
Check out which are in the old version and update the drivers. If you fail to find the drivers which are causing the issue, then update all the drivers which are appropriate to download on Windows 10. Follow the steps to update the recent drivers:
Step 1: To open the device manager, press Windows + X.
Step 2: Check all the drivers, and the driver, which is incorrect, will have an exclamation mark. If you any such driver, then uninstall and reinstall it. The best advice is updating all the drivers so the hardware will coordinate with the updated Windows System without any errors.
Step 3: Right-click on the specific old driver and tick on the Upgrade Driver Software.
Method 9: Check Your Disk
By using the command prompt, you can check if there are any errors caused by the disk.
Step 1: Go to the Start button and search for the command prompt. Then Right-click on the command prompt and choose the option Run as administrator.
Command prompt window will open up in administrator mode.
Step 2: Type chkdsk C: /f command and press Enter. (Replace C if you are checking a disk that starts from other than the C letter)
With the help of this command, it will check if there are any errors caused by it. If you do not use the /f parameter, chkdsk shows a message that the file needs to be fixed, but it will not automatically fix the errors.
While the chkdsk C: /f command will identify and fix all the issues affecting your drive. For repairing the physical issues as well, use the /r parameter as well.
Method 10: Reinstall or Refresh the Windows
If you are still encountering the error, try this method. This is the easiest and efficient method that will solve the error. When you refresh your Windows, it will keep your data intact, but the base operating system will be reinstalled.
Step 1: Refresh your system by pointing your mouse on the right side of your screen.
Step 2: Then, click on Settings > Change PC Settings > Update and Recovery > Recovery.
Step 3: Lastly, click on, OK.
If you chose to Reinstall the Windows, it would remove everything from the drive on your system, especially the C drive. To reinstall format your C drive first and then insert your Windows OS DVD and then start.
Read Also:
Conclusion
Well, these were some of the methods to solve the Critical Process Died error. The methods are very easy to follow and do not cause any harm to the personal data on your computer system.
Hoping that the above methods will help you to get rid of your error problems.


