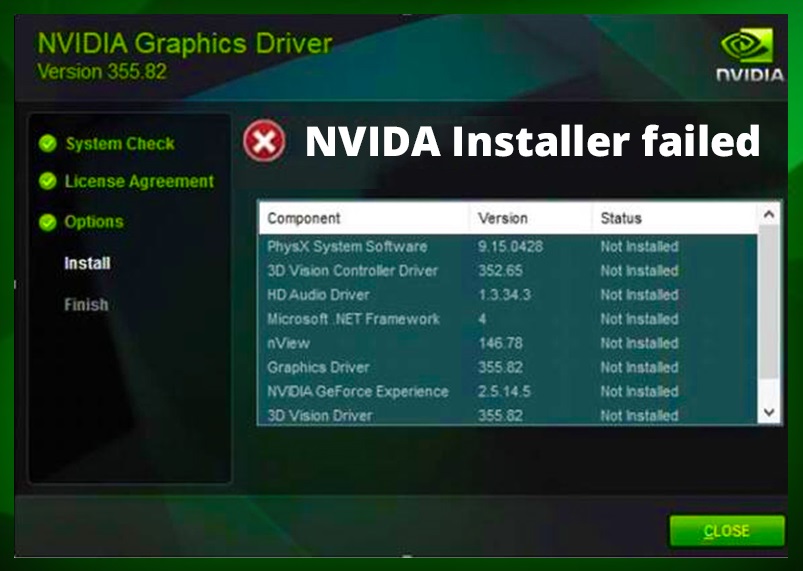
Currently, Windows 10 users are facing a common issue of NVIDIA Installer Failed. Here, in this article, we will guide you with the procedures of solving this error. We have discussed 5 best methods that will help to get rid of this error.
Only gamers can understand the real value of graphics cards like NVIDIA, AMD, etc. Graphics cards have very much importance n gamer’s life. It helps them to easily run games like Smite, GTA, etc.
A graphic card is a hardware installed in the computer systems. Moreover, we necessarily need a driver to run the graphics card in our system. A Driver is an important element that stands like a bridge between the Operating System and the Hardware.
However, various reasons encourage the error of NVIDIA Installer Failed. We have mentioned some of them below:
- An outdated driver can cause the error as the system will not use the NVIDIA graphic card.
- The unsuitability of an old driver in Windows 10 Operating systems that builds a disparity with the GPU of the device.
- The driver which you are using might be corrupted.
Read Also:
Contents
How to Fix NVIDIA Installer Failed Error
The NVIDIA Installer Failed Issue is a very common issue encountered mostly by the Windows 10 users. Here, we have discussed the best 5 solutions to get rid of the error and boost your performance at its maximum.
Solution 1: Disabling the Antivirus and Firewall Temporarily
You need to follow certain steps to disable the Antivirus and Firewall temporarily. This can help you to resolve the error NVIDIA Installer Failed easily. The steps are given below:
Step 1: From your computer screen, navigate to the Antivirus icon displayed at the right-bottom corner system tray and right-click on the icon. Look for the ‘Disable’ option. Now, click on the Disable option.
Step 2: A new list will appear. Here, you need to choose a time slot for which you need to disable the Antivirus. Next, choose the suited time frame. Moreover, select the 15 minutes or 30 minutes time frame.
Step 3: Next, you have to re-install the NVIDIA Installer and see whether the error persists.
Step 4: Following that, you need to press the Windows key + I key at the same time. A list will appear. Select Control Panel from the list.
Step 5: Next, you need to look for the ‘System and Security’ option from the control panel and click on it.
Step 6: From the System and Security option, click on the ‘Windows Firewall’ option.
Step 7: After that, click on the “Turn Windows Firewall on or off” option located at the left window panel. Then, turn off the Windows Firewall.
Step 8: Lastly, reboot your computer system and install NVIDIA Installer again to resolve the error.
Note: In case the method fails, you do not have to worry. You just need to perform the same steps mentioned above and turn the Firewall ON.
Solution 2: Update the Driver Manually
Follow the steps mentioned below to update the driver manually:
Step 1: Press the Windows + R keys at the same time. This will open the Run dialogue box. Now, in the Run dialogue box, you need to type devmgmt.msc. After that, press the Enter button.
Step 2: The device manager window will open. Find the ‘Display adapters’ option and click on it. After that, a device list will appear. Here, you need to right-click on Standard VGA Graphics Adapter.
Step 3: After that, hit on the “Update Driver Software” option to update the driver. Moreover, before continuing further, look for the Windows Update Service Not Running Error.
Step 4: Lastly, you need to restart your device to save the changes made.
Check that the error NVIDIA Installer Failed persists or not. If you still face the NVIDIA Installer Failed error, follow other methods given below.
Solution 3: Disable Drivers or Use Tools
Disabling the Drivers or Use Tools will help you to resolve the error. For that you need to follow the steps given below:
1. Remove the NVIDIA Drivers files from the computer
The steps of removing the NVIDIA Driver files are as follows:
Step 1: First of all, you have to install the “Driver Sweeper” on your PC.
Step 2: Secondly, you need to apply to the “Take Ownership to Registry” option.
Step 3: After that, restart your device. Just remember you need to open it in safe mode.
(Continue pressing the F8 key while the device is starting to open it in safe mode. It will display a new window on your screen. Click on the safe mode option and continue).
Step 4: Lastly, you have to delete all the NVIDIA driver data that were installed on your computer while updating Windows. The NVIDIA Driver data list is as follows:
- C:\Windows\System32\DriverStore\FileRepository\nvdsp.inf file
- C:\Windows\System32\DriverStore\FileRepository\nv_lh file
- C:\Windows\System32\DriverStore\FileRepository\nvoclock file
- C:\Program Files\NVIDIA Corporation\
- C:\Program Files (x86)\NVIDIA Corporation\
Step 5: Lastly, delete every single thing that is related to NVIDIA with the help of Driver Sweeper. After that, restart your computer to save the changes done. Look whether the error remains.
2. Perform a Clean Installation of Supersole Role
Follow the steps discussed below to perform the clean installation of Supersole role:
Step 1: Firstly, you need to download the PStools software and install it.
Step 2: Secondly, you have to move the PsExec.exe file to the path mentioned below:
C:\Windows\System 32\
Step 3: Next. Open the Run Dialogue box by clicking on Windows + R keys simultaneously. Then, type the below-mentioned command in it:
psexec -i -s C:\NVIDIA\DisplayDriver\xxx.xx\windows_version\English\Display.Driver\setup.exe
Step 4: Next, you have to select the Custom Installation in place of Express installation, once you face the License Agreement Screen.
Step 5: Next, you need to check the box next to ‘perform a clean installation’ and uncheck the box of the NVIDIA Update.
Step 6: Lastly, restart your device to save the changes applied. This will resolve the NVIDIA Installation Failed Error.
Solution 4: Performing a Clean Boot
Proceed with the following steps to perform a clean boot:
Step 1: First of all, press the Windows + R key at the same time. The Run dialogue box will appear. Here, you need yo write msconfig and then press the Enter button.
Step 2: If you have not chosen the Selective Startup under the General tab, select it now.
Step 3: Next, from the Selective startup, uncheck the Load Startup option.
Step 4: Following that, click on the checkbox next to the ‘Hide all Microsoft Services’ option under the Service tab.
Step 5: Now, click on the “Disable all” option to disable all the unnecessary services. Moreover, see if there is any Unmountable Boot Volume Error persists.
Step 6: After that, click on the open Task Manager option from the Startup tab.
Step 7: Then, disable all the enabled the Startup items and click on OK.
Step 8: Next, restart the computer.
Step 9: Again, click on the Windows key and R key altogether. The Run dialogue box will appear, type ‘msconfig’.
Step 10: You need to navigate to the General tab again and then select the Normal Startup option. Then click on OK.
Step 11: A prompt message will display asking you to restart the computer. Lastly, restart the computer to get rid of NVIDIA Installer Failed Error.
Solution 5: Run SFC and CHKDSK
To run SFC and CHKDSK, follow the steps mentioned below:
Step 1: Firstly, open Command Prompt as an admin. To open it click on the Windows Key + X key at the same time.
Step 2: Here, you need to write the given command:
sfc /scannow

sfc /scannow /offbootdir=c:\ /offwindir=c:\windows
Step 3: After that, you have to restart your computer once the above steps are done. So restart your computer to save the changes made.
Step 4: Now, you need to run CHKDSK. You will find it under Check Disk Utility.
Step 5: Lastly, you have to restart your computer system after you have completed all the steps mentioned above. Reboot your computer to save all the changes made.
Read Also:
Conclusion
In this article, we have mentioned the reason for causing the error NVIDIA Installer Failed. Moreover, we have discussed all the best 5 solutions that will help you to get rid of the error NVIDIA Installation Failed.
The above methods will surely help you to resolve the error. Be patient and follow all the steps carefully to get the best result and get rid of this issue. Read the complete article and resolve the error occurring on Windows 10.


