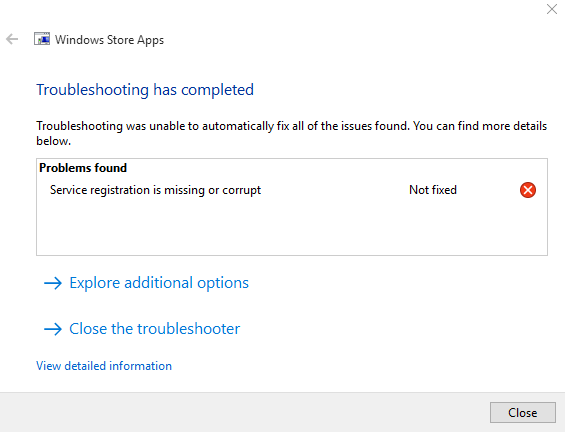
Service Registration is Missing or Corrupt is a prevalent issue these days. Today we will try to figure out this problem by giving you some tips and tricks. A variety of solutions is available for the error service registration missing or corrupts in Windows 10 or another version.
Several users have complained about this issue when running the Windows Update Troubleshooter and don’t know how to fix Service Registration is Missing or Corrupt problem. We will provide you the accurate and directly to the point information that makes us stand apart from all the market competitors. The error occurs mainly because the system is unable to update its files.
Contents
How to Fix Service Registration is Missing or Corrupt on Windows 10
Many other complicated problems also exist there, but we will approach them one by one. So let’s start with our first solution. You can use the PC Repair and Optimize Tool, a quick tool used to protect your computer from file or data loss, malware, Trojans, hardware failure, and optimize your PC to the best level. You need to install this PC Repair tool and start the scan button to find errors or bugs prevailing on your computer.
Method 1: Start Windows Update Procedure
The prime and most genuine reason behind the service registration is missing and corrupt could be the non-updating of Windows function. This method will solve the error maximum times and can be highly useful to you in later stages also. If any user pauses the update for some time, they may experience security problems. Most computers already have the default setting of the update being set to automatic. This error causes the Windows Operating System or the other universal applications to install the required updates whenever available.
Step 1: Open “Run” by pressing the Windows key and R together.
Step 2: Insert the keyword services.msc in the run box and hit enter.
Step 3: Locate and select the “Windows Update” service to uncheck the “Windows Update Properties” dialog.
Step 4: Make “Startup Type” turn to automatic and enter “Apply”.
Step 5: Select the “start” button to start the service.
Step 6: Repeat the above-mentioned steps to start and restarting “Background Intelligent Transfer Service” and “Cryptographic Service“.
Step 7: Download and install the updates once again and check the error again.
Method 2: Immobilize Windows Firewall Temporarily
It is a bit complicated task but still provides you with valuable results. As this method proceeds further, it protects your computer from other damages also.
Step 1: Open the “Control panel” and locate and click “Windows Firewall”.
Step 2: Toggle between “Turn Windows Firewall On or Off”.
Step 3: Select the Radio button next to turn off Windows Firewall and then hit Ok.
Note: After the successful procedure, please turn on the Windows Firewall immediately for the safety and security of the system.
Method 3: Initiate sfc/scannow Command
Every time if there is an error, the most reliable and expert stuff which comes to the rescue is the command prompt. Hence we will also use this to assure our victory.
Step 1: Press both Windows key and X simultaneously and after that, click on the command prompt.
Step 2: Type the command sfc/scannow and then press OK.
Step 3: The previous step will take a lot of time to execute, so one needs to be patient and cooperative during this time.
Method 4: Run Windows Update Commands
Introducing you to the fourth method to solve the issue service registration is missing or corrupt, you can run the Windows update command and check whether this fix is useful or not. You can go with the following steps in order to proceed to the Fourth method. This method has helped thousands of people.
Step 1: Search Command Prompt in the search box of Windows 10. Select it and run it using Run As Administrator.
Step 2: In the pop-up command window, type the below-written commands and hit enter to go on after each command:
Net stop wuauserv
net stop cryptSvc
net stop bits
net stop msiserver
ren C:\Windows\SoftwareDistribution SoftwareDistribution.old
ren C:\Windows\System32\catroot2 catroot2.old
net start wuauserv
net start cryptSvc
net start bits
net start msiserver
Step 3: Wait until the process is completed, and then after the process is complete then close the command window
Step 4: After this, restart your computer and check if your issue is solved or not.
Method 5: Change the Registry Value
In this method, you need to change some registry values.
Step 1: Press Windows and R keys simultaneously to open the Run dialog, type regridit in the box, and click ok to continue.
Step 2: In the Registry Editor Window please navigate to the following folder along with the path.
Step 3: You have to check for ThreholdOptedIn on the right side of the screen and select delete to remove it. After this, reboot your computer to see if the issue is solved or not.
Method 6: Uninstall Antivirus Software Temporarily
Software antivirus on one side while protecting your computer from virus gives some side effects which causes problems in the OS. So in order to solve the issue of service registration is missing or corrupt, you can try uninstalling the antivirus software temporarily and then reinstalling it.
Step 1:Open control panel to enter its main interface.
Step 2:Click the program to continue and then choose antivirus software and choose Uninstall to remove it temporarily.
Step 3:After the antivirus is installed, you can restart the computer again and check for the issue again.
Method 7: Change the Group Policy and use DISM
Step 1: Press both Windows Key + R and then enter gpedit.msc. Press Enter or click OK.
Step 2: From the left side navigation to computer configuration>>Administrative Tools > System. In the right pane, double click Specify settings for optional component installation and component repair setting.
Step 3: Select Enabled and then enter the location you want to repair. Click Apply and OK to save changes.
Step 4: As soon as you close the group policy editor, run the DISM scan again.
Method 8: Use Windows 10 ISO to repair Windows 10
Step 1: Download Windows 10 ISO from Microsoft’s website. Alternatively, you can use the Media Creation Tool.
Step 2: Once you downloaded the ISO file, double click it in order to start it.
Step 3: Follow the instructions as given to upgrade Windows 10
Method 9: Run wsreset
Step 1: Press Windows Key + R and enter wsreset.exe
Step 2: Press Enter and then click ok and wait until the process is finished.
If the issue still sustains, then you need to download the necessary updates in the background. For that, run command prompt as administrator and enter netstop wuauserv command and press enter. This is just a potential workaround, and it might not be the permanent solution.
Method 10: Create A New User Account
Step 1: Open the Settings app and then navigate to Accounts > Family and other users.
Step 2: Click Add someone else to this PC button.
Step 3: Click Add a user without a Microsoft account.
Step 4: Enter the name of the user. You can also add a password to protect the new account. After that, click the next button.
Step 5: After creating a new user, switch to it, and check whether the issue still sustains or not.
Method 11: Download the Necessary Updates in the Background
Step 1: Start Command Prompt as Administrator.
Step 2: Enter net stop wuauserv command and press enter. After the press enters to detect and download the necessary updates. It might not be the permanent solution, but still, you can try this as a preventive measure.
Method 12: Re-enable Windows Defender Firewall service
Step 1: Open the services window. To do that, press the Windows Key + R and enter services.msc. Press enter and click OK.
Step 2: When the services window opens, locate the Windows Defender Firewall service and double click it.
Step 3: Make sure that the startup type is set to automatic, if not done, please make it so.
Step 4: Click the stop button to stop the services and then click the Start button to start it again.
Step 5: Click apply and Ok to save changes.
Method 13: Refreshing your .NET files
.NET files are the core of your PC, and without them, many operations do not work. We can try refreshing those files manually and check if the issue is resolved or not.
Step 1: Press Windows + R to launch the application. Then type the control panel in the dialogue box and press enter.
Step 2: Once you are in the control panel, click on Turn Windows features on or off residing in the subheadings of Programs and Features
Step 3: Then, a list will pop out in front of you. While this list is coming, it will take a lot of time. So one needs to be patient while checking this.
Step 4: Once seen, uncheck all the boxes containing the keyword of .NET. This process will uninstall .NET entirely and may take some time.
Step 5:Now open the Window again and check all the boxes which you unchecked earlier. Press Okay to save changes.
Method 14: Resetting Windows Update using Reset Tool
Next, we see how we can reset our windows Update using different techniques. One of these methods includes the reset tool for Windows Update. This.exe file must be run using run as administrator. It has a script itself that checks certain factors of your Windows Update and configures them accordingly.
Step 1: Download the Reset tool and save it in a file location.
Step 2: Access the file and unzip it into an accessible location.
Step 3: As soon as you unzipped the file, run the cmd file by right-clicking it and run as administrator
Step 4: After the process is finished, restart your computer for the changes to take place and check if the problem is solved or not.
Method 15: Resetting Windows Update Using a Batch File
We can try resetting the Windows Update using a batch file that contains all the required information. Follow the below steps to implement this method.
Step 1: Download the batch file and save it in an accessible location.
Step 2: Right-click and run it using Run As Administrator.
Step 3: As soon as your commands have run, try restarting your computer so that the functions work properly.
Method 16: Restoring Your System
If all these methods do not work, we have our final solution, which is restoring our system. Save all your work correctly and back up any important data on your PC.
Step 1: Press Windows + S to launch the start menu’s search bar. After that, type restores in the dialog box and selects the first program that appears.
Step 2: Enter System Restore at the beginning of the Window under the tab of system Protection.
Step 3: A Wizard will open, navigating you through all the steps to restore your system. Press next and proceed with all the further instructions.
Step 4: Now, Windows will confirm your actions before the last time before it starts the restoring process.
Conclusion
The dogmatic approach should be thrown away from the minds of people, and a genuine thought process should be taught within every individual’s mind, which will let them ponder over the right advice. Whatever the error may be, it should not create a panic situation in the minds of people.
Now I hope that the error service registration is missing or corrupt has been solved, and your system would be free from the unnecessary load of errors that does not have any justified reason for existence.
On a general note, Windows Update is an important aspect as it helps computer users to update their OS to the latest version. There might be some problems arising while updating the OS, so in such a situation, the Windows Update Troubleshooter plays an important role in finding and fixing the problem.


