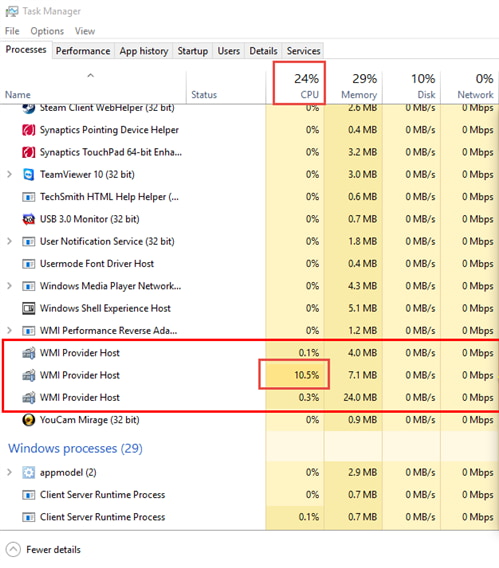
Windows Management Instrumentation Provider Service is also known as WmiPrvSE (or WmiPrvSE.exe). In the Task Manager, it is displayed as the WMI Provider Host. Microsoft Windows OS (Operating System) consists of a component called WMI Provider Host. It is used to control the enterprise environment and also provides management information.
Managers use it to set query information on the system networks, programs, components, and other enterprise components. Developers use the WMI Provider Host and help Windows users to alert them if an insignificant action occurs.
Contents
How to Fix WMI Provider Host (WmiPrvSE.exe) High CPU Usage On Windows 10
The error is mostly seen while the users update their system from Windows 7 to Windows 10. The users have reported that they see a sudden system lag, and the system gets hot and slow. It occurs if some service misbehaves and all you need to do is fix those services and you are good without any High CPU usage and error will be solved.
Method 1: Restarting the Windows Management Instrumentation Service
Step 1 – Press Windows key + R to open the Run command.
Step 2 – Type services.msc in the search box and hit enter.
Step 3 – Different Services list will be provided from that search for the Windows Management Instrumentation Service.
Step 4 – Right-click on the service and select the Restart option. This will restart your service and the High CPU Usage issue will be solved.
Method 2: Restart Other Associated Services
Step 1 – Go to the Start Menu and click on it. Search for Command Prompt (Admin).
Step 2 – Open the Command Prompt (Admin) and type the following commands in the prompt. Press Enter after typing each command:
net stop iphlpsvc
net stop wscsvc
net stop winmgmt
net start winmgmt
net start wscsvc
net start iphlpsvc
Step 3 – Restart your computer now and the CPU usage error will get fixed.
Method 3: Perform a Clean Boot to Identify a Faulty Application
Sometimes some applications tend to use high CPU usage by WMI Provider Host. Performing a clean boot will help you from the applications that are taking up the high CPU usage. In the Clean Boot process, vital services are loaded while the other services are disabled.
Step 1 – Press Windows key + R to open the Run command.
Step 2 – In the search box type MSConfig and hit enter.
Step 3 – Window will pop up, select the Services tab from it.
Step 4 – At the Services tab, you will find the Hide all Microsoft Services button at the bottom, You need to uncheck it.
Step 5 – Then, on the next corner Disable all button is present click on it.
Step 6 – Now, besides the Services tab another tab is there that is the Startup tab, click on it.
Step 7 – Open Task Manager will be below it. Click on that.
Step 8 – The startup button is available in the Task Manager tab, click on it.
Step 9 – From the displayed application select the application that has an Enabled tag, select that particular application right clicks on it, and select Disable option.
Step 10 – You have to keep doing it for all the applications in the list.
Step 11 – Restart your computer now. Your computer is successfully in the Clean Boot state.
High CPU no longer exists then the third-party applications were the one that was causing the problem. Enable one service at a time and stop the process if you encounter High CPU usage. Enable the service/ application by reinstalling or keep it disabled.
Method 4: Locate the Process Using Event Viewer and Uninstall It
Step 1 – For Windows 7 users or earlier, for opening the Event Viewer go to the Start Menu and search Event Viewer and open it. For the users of Windows 8/8.1 or 10, press Windows key + X this will open up WinX Menu, and from that click on Event Viewer.
Step 2 – Once the Event Viewer is opened, click on View situated on the toolbar. In the dropdown Show Analytic and Debug Logs options are present, click on it.
Step 3 – Applications and Services Logs are visible on the left side of the panel then navigate to Microsoft than Windows and finally, you will reach to WMI-Activity.
Step 4 – Open the WMI-Activity by double-clicking it. From the list click on the Operational option. This will open up the WMI Provider Host’s operational logs.
Step 5 – Search for any errors, click on it if you find any errors, and its specifications will be displayed at the bottom.
Step 6 – In the general tab of the error search for ClientProcessId term and remember the number(s) or note it down somewhere.
Step 7 – Exist the Event Viewer and go and open Task Manager by pressing Windows key + R that will open the run prompt. Type taskmgr and hit OK.
Step 8 – Go to the Services tab and search for the service that consists of the same Process ID (PID) as the number(s) that you noted down for the ClientProcessID term.
Step 9 – If you find the same Process ID that the corresponding service is inappropriate and disable it as soon as possible.
Step 10 – Now, navigate to the Control Panel and select Programs & Features.
Step 11 – Uninstall that program that was inappropriate.
When you are finally done uninstalling, WMI Provider Host will be set to normal and use a small amount of CPU.
Conclusion
Once you fix the services that are creating problems your issue will be solved. Disable or reinstalling services in order to make them work fine by following the above steps. Your WMI Provider Host (WmiPrvSE.exe) High CPU Usage On Windows 10 issue is fixed when you follow the steps carefully.


