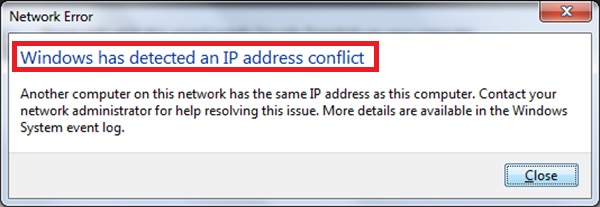
When more than one device has been assigned the same IP address as your PC, then Windows may detect an IP address conflict. Windows Has Detected An IP Address Conflict is a frequently occurring common issue.
Having the same IP address on more than one computer is not possible as IP address a unique identity. An IP address is a fascinating product of modern computer technology designed to allow one connected computer (or “smart” device) to communicate with another device over the Internet.
The IP address allows the location of literally billions of digital devices that are connected to the Internet to be pinpointed and differentiated from other devices. If more than one device has the same IP Address, then the computer will not connect to the network.
This makes the system incompetent to assign actions to different computers. Thus this error is raised:
Contents
How to Fix Windows Has Detected An IP Address Conflict in Windows 10, 8 and 7
Another computer on this network has the same IP address as this computer. Contact your network administrator for help resolving this issue. More details are available in the Windows System event log.
This issue can be solved by using any of the following methods listed below:
Method 1 – Release And Renew IP address
Follow all the steps listed below meticulously.
Step 1: First, Go to the Start menu and type “cmd” in the search box. You will see an option named cmd in the list of search results. Or press Windows key+ X and choose Command Prompt (Admin) from the menu.
Step 2: Now On the black window that comes next type “ipconfig/release” and press Enter. Then wait till you see the arrow key again on the Command Prompt screen (black screen).
Step 3: Then type “ipconfig /renew” and press Enter. Also quickly lookout for any DNS Address Could Not Be Found Error in your PC as well.
Sometimes the router might fail to give an appropriate IP address to the computer. It may give rise to an error such as Windows has detected an IP address conflict.
Method 2 – Explicitly Starting The Router
Step 1: First, Look for the Power button on your router.
Step 2: Once you find it, then press the power button on the router (this will switch OFF the router) and wait for 10-20 seconds.
Step 3: Now, press the Power button again to switch ON the router.
Other methods to solve these problems are:
You May Also Like:
Method 3 – Eliminate The Static IP
Follow these easy steps to solve Windows Has Detected An IP Address Conflict:
Step 1: First, press the Windows Key + R key together. You will find a window popped open.
Step 2: Then type “ncpa.cpl” in the blank space in the box and hit Enter. It will open the Network Connections window.
Step 3: In the Network Connections window, then Right-Click on Local Area Connection and choose Properties from the list.
Step 4: A new window will open, then Double-click on Internet Protocol Version 4 (TCP/IPv4). In this window, select Obtain an IP address automatically and Obtain DNS server address automatically options. Then click on the OK option.
Step 5: Restart your computer, and hopefully, finally you will see the error message is gone.
Method 4: Disabling IPv6
Step 1: First, press the Windows Key + R together. A new window will appear on your computer screen.
Step 2: Then type “ncpa.cpl” in the blank space provided and press the Enter key. Network Connections window will open.
Step 3: Then CLICK right on Network Adapter and choose Properties option from the list.
Step 4: Now in the properties, window Uncheck Internet Protocol Version 6 (TCP/IPv6) and then click OK.
Step 5: THEN Right-Click again on Wireless adapter and select Enable from the list. Finally, this will restart your network adapter on your computer.
Method 5: Disable And Enable Network Adapter
Step 1: First, press the Windows Key + R together.
Step 2: Then type “ncpa.cpl” and hit the Enter button. However, make sure your PC is not facing the Network Adapter Missing Error.
Step 3: Then Right-Click on your Wireless Adapter and select Disable from the list that gets open. It will stop the network adapter on your computer.
Step 4: Finally Right-Click again on Wireless adapter and select Enable from the list. Finally, this will restart your network adapter on your computer.
Also Read:
- Err_Cache_Miss
- ERR_EMPTY_RESPONSE
- Steam Content File Locked
- Discord Mic Not Working
- Confirm Form Resubmission
Conclusion
Most probably any one of the methods as mentioned above must have undoubtedly has solved the Windows has detected an IP address conflict error. So, in the future whenever you encounter this error, hop on and follow the methods mentioned above and make sure you don’t have any Windows Update Not Working error in your system.
By following these methods, you can show off your techie skill in front of your friends and family. At last but not least, I would like to conclude my article by saying: “By seeking and blundering, we learn.”


