There can be a situation, where after you switch on the computer, you come across an error that does not let you access the Internet. In order to get rid of this error, you troubleshoot the program which can be done using the Windows Network Diagnostics tool.
After the troubleshooting is completed you will get an error that says Windows can’t communicate with the device or resource especially the DNS server. The Windows can’t communicate with the device or resource error will be interfering with your day-to-day normal work.
So you need to find a solution to Windows Can’t Communicate With the Device or Resource error. So here is what you will need in order to deal with the Windows can’t communicate with the device or resource error.
There will be multiple solutions listed below so that you can find the solution for the Windows can’t communicate with the device or resource error from one among the listed solutions.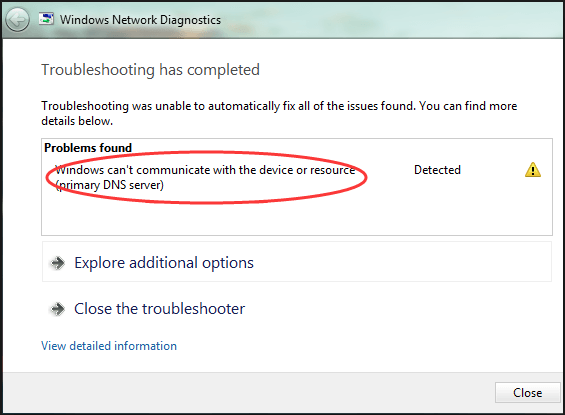
But before that let us give a peek into the concept of a DNS server. The DNS stands for Domain Name System. The main function of the DNS is to convert a computer’s hostname into an IP address on the Internet.
For instance, if a computer needs to communicate with the webserver say example.net then the computer will need the IP address of the server example.net. The error Windows can’t communicate with the device or resource occurs when your computer is unable to connect to the primary DNS server which is set by your Internet Service Provider.
Read Also:
This error message pops up in the Network Diagnostics which is run when you are unable to connect to the internet. In this article, we have listed four solutions for the readers in order to solve the Windows can’t communicate with the device or resource error.
We have considered all the situations under which the Windows can’t communicate with the device or resource error can occur and therefore if you do not find the solution in the first attempt, kindly be patient and try the rest three solutions one by one.
Contents
How To Fix Windows Can’t Communicate With The Device Or Resource?
The solutions which are listed below will be applicable for all the users of Windows 10, 7, 8, and 8.1.
Solution 1: Obtain The DNS Server Address And IP Address Automatically
Perform the following steps in order to obtain the DNS server address and IP address automatically.
Step 1: To begin the process first you are required to open the Control Panel.
Step 2: There will be a large number of options visible to you. Among all the options, that you come across you will have to choose the Large Icons.
Step 3: Then from the list, you will come across and choose the Network and Sharing Center.
Step 4: Then move to the list and you will come across many other options. Select the Change Adapter Settings.
Step 5: Then you have to select the network that you are using. This can be done by right-clicking on the network.
Step 6: Once you select the network you will come across a list.
Step 7: Choose the option which says Properties.
Step 8: In the Properties list, choose the option which says Internet Protocol Version 4 (TCP/IPv4).
Step 9: After selecting the Internet Protocol Version 4 (TCP/IPv4), choose the option Properties.
Step 10: Then, you will have to check the option which says Obtain IP Address automatically.
Step 11: After that, select the option which says Obtain DNS Server address automatically.
Step 12: To continue the process select the option OK.
Step 13: Then to save the changes that you have made, click on the Save options.
Step 14: Go back to the option which says Properties.
Step 15: In the Properties list, choose the option which says Internet Protocol Version 4 (TCP/IPv6).
Step 16: After selecting the Internet Protocol Version 4 (TCP/IPv6), choose the option Properties.
Step 17: Then, you will have to check the option which says Obtain IP Address automatically.
Step 18: After that, select the option which says Obtain DNS Server address automatically.
Step 19: To continue the process select the option OK.
Step 20: Then, to save the changes that you have made, click on the Save options.
Step 21: Restart the computer.
Once you are done with the restarting of the computer, check whether the Windows can’t communicate with the device or resource error persists.
If not then continue with the normal schedule and if the Windows can’t communicate with the device or resource error still continues to interfere with your work, then move to the next solution.
Solution 2: Change The DNS to Google’s Public DNS
Perform the following steps in order to change the DNS to Google’s public DNS.
Step 1: To begin the process first you are required to open the Control Panel.
Step 2: There will be a large number of options visible to you. Among all the options, that you come across you will have to choose the Large Icons.
Step 3: Then from the list, you will come across and choose the Network and Sharing Center.
Step 4: Then move to the list and you will come across many other options. Select the Change Adapter Settings.
Step 5: Then you have to select the network that you are using. This can be done by right-clicking on the network.
Step 6: Once you select the network you will come across a list.
Step 7: Choose the option which says Properties.
Step 8: In the Properties list, choose the option which says Internet Protocol Version 4 (TCP/IPv4).
Step 9: Then after selecting the Internet Protocol Version 4 (TCP/IPv4) choose the option Properties.
Step 10: Then you will have to check the option which says Use the following DNS server address.
Step 11: Once you are inside the Preferred DNS Server field, you will have to type 8.8.8.8.
Step 12: To continue the process select the option OK.
Step 13: Then to save the changes that you have made click on the Save options.
Step 14: Restart the computer.
Solution 3: Clear DNS Cache
Perform the following steps in order to clear the DNS cache
Step 1: To begin the process first you are required to type Command Prompt in the search box.
Step 2: Then, you have to right-click on the Command Prompt option.
Step 3: Select the option which says Runs as Administrator.
Step 4: Once inside the Command Prompt option, you have to type ipconfig /flushdns.
Step 5: Then to continue the process press the Enter button on the keyboard.
Step 6: Restart the computer.
Solution 4: Modify The Hosts File
Perform the following steps in order to modify the host’s file.
Step 1: To begin the process first you are required to open C: Windows\System32\drivers\etc.
Step 2: There will be a large number of options visible to you. Among all the options, that you come across you will have to choose the hosts file option.
Step 3: Then from the list, you will come across and choose the open with Notepad.
Step 4: Then, to continue the process delete all the contents.
Step 5: Then, you have to select the keys Ctrl + S simultaneously. This is done to save the file.
Step 6: Restart the computer.
Read Also:
Conclusion
The above-mentioned solutions should be efficient enough for resolving the problem of the error Windows can’t communicate with the device or resource. Apart from that, the user should also have knowledge about network drivers.
There can be a chance that the network drivers which is used by you can be faulty. In order to resolve this, it is advised that you should update the network driver. Now, this up-gradation of the network driver can be done in two ways it can be done manually or sometimes automatically.
We are sure that the solutions will solve the Windows can’t communicate with the device or resource error. We hope this article is beneficial in providing knowledge to the readers.


