Do you want to make a change in your home? Do you need to coordinate the wallpaper with the interior design and furniture? Are you tired of your old, drab wallpaper? Do you have a shabby, shattered wallpaper?
Is your background not sending you positive vibes? It’s time to make a shift. You’re in luck since there are only six steps to removing your old, dingy wallpaper. You may now improve the quality of life in your house.
Contents
Getting Rid Of Wallpaper
The following are six steps that can assist you in doing so:
1. Protecting the Floors and Electrical Outlets
NOTE: You must shield your wall from the water used to apply the wallpaper.
It would be nice if you had painter’s tape to protect your floor with a tarpaulin sheet or a cover, or if you could cover the bottom with an old piece of fabric or an old carpet.
You’ll also need to use painter’s tape to cover all of the electrical outlets, switch plates, and other exposed surfaces with the same tarp cover. After removing the wallpaper from all conceivable locations, attempt removing the tarp tape and removing the wallpaper from the hidden areas created by the tarp layer.
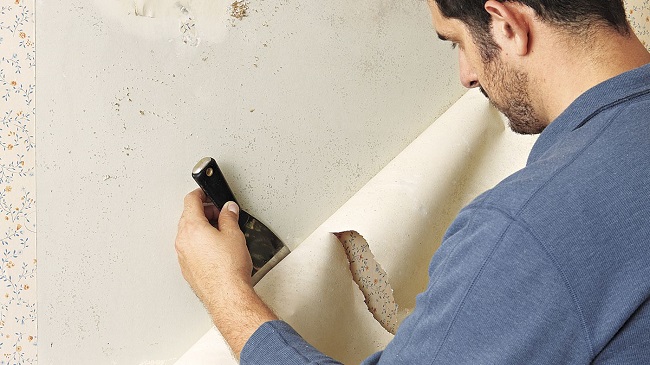
2. Remove the Wallpaper
Of course, you can scrape your wallpaper with a large knife or a scraper. You’ll notice a variety of wallpapers, such as textiles, bamboo-coated wallpapers, and maybe vinyl-coated wallpapers.
The inner layer appears to be made of paper, while the outer core is almost certainly composed of vinyl or possibly fibre, and in some cases, plastic uppers. You can begin by scraping the surface with the scraper, or you can use a putty knife.
Find a reassuring edge and begin scraping it with your chosen instrument. In most situations, the wallpaper comes in sheets. It needs to be pulled down or scraped against the wall. Your wish is yours, in the sense that it is expressed in the manner in which you are most at ease.
NOTE: A spatula can also be used (metal). Please don’t criticise it too harshly. It’s possible that you’ll rip a hole in the wall.
3. Select a Background
Warm water solutions are compatible with the majority of wallpapers. Warm water is used to soften the wallpaper, which causes the layer of the wallpaper to become thinner and thinner, making it easier to remove.
You may also use a sponge to help with the process, and it’s best to leave the hot water on for at least 15 minutes to allow the wallpaper to fully absorb it. Many wallpapers are quite water soluble. A particular instrument, known as a wallpaper scoring tool, is used to remove wallpaper from your walls.
This tool aids in the entry of hot water to the edge of the wallpaper, allowing it to relax its grasp on the wall. It is not prohibitively expensive, so you can purchase it.
You must gently move it up and down in order for the wallpaper to come out effortlessly. If you don’t do it with enough strength, you may end up doing double work, puncturing the wall and having to perform the plastering yourself. Simultaneously, you need be aware of how to get rid of Fruit Flies.
4. Combine Hot Water Solution With The Other Ingredients
All that’s left to do after the third step is to make a DIY water solution for your old wallpaper. There are two options: combine the hot water with vinegar or with fabric softener. It would be beneficial if you could determine which method is best for your wallpaper.
Also, keep in mind that the solution should only contain hot water. Water that is too cold or too hot will not work. Fill an empty spray bottle halfway with hot water and the rest of your solution.
Use the spray to wet the walls; don’t forget to cover the floors and electrical outlets, such as switchboards. Take considerable care, such as not allowing the spray to enter your eyes or any other sensory organs, as this might cause serious harm.
You can also arrange a garbage can beside you, near where you’re working, so that you can throw the scraped wallpaper right into it without making a mess all over the area. In the end, this will save you time. If you maintain your house tidy while working, you won’t have to clean it later.
Step 5: Use The Solution
All that’s left is to squirt the hot water solution on the wall. Take a small-small portion to make it simple and quick for you. Take four 4X4 wall portions and shower them with water. Allow two to three minutes for the spray to dry after application.
You can try scraping the wall again, but this time start from the corner to make it easier for you to scrape it out. Apply the same technique to the entire surface.
NOTE: Even after using the spray, only remove the wet area, not the dry area. Because scraping the dry surface area of the wall is tough, you risk damaging it. As a result, leaving that location is simple.
You’ll need to re-spray the portion that was left out (the dried one) before scraping it off. Remember to repeat the process with the cover on the outline of the electrical outlets, such as switchboards, plugins, and so on.
6. Get Rid of Any Adhesive That’s Left
Once all of the work has been completed. All of the wallpaper scraping and removal is completed in some way. You’ll note that there are still a few pieces of the wall that are visible.
Apply the same hot water solution to the left of the wallpaper and repeat the process. Allow two to three minutes for it to settle. Start scraping that off as well. Rep the first step, this time using the same tarpaulin tape to cover your electrical outlets.
Also, after all of the scarping and removing the wallpaper from the wall, wipe your wall lightly with a moist cloth to do the spraying and scraping around the corners and outlines of the electrical outlets.
Final Thoughts
You’re finished with the old wallpaper now. You can also repaint your walls with new, vibrant hues. Apply an oil-based primer to your wall before you begin painting to prepare it for new, brilliant colours.


