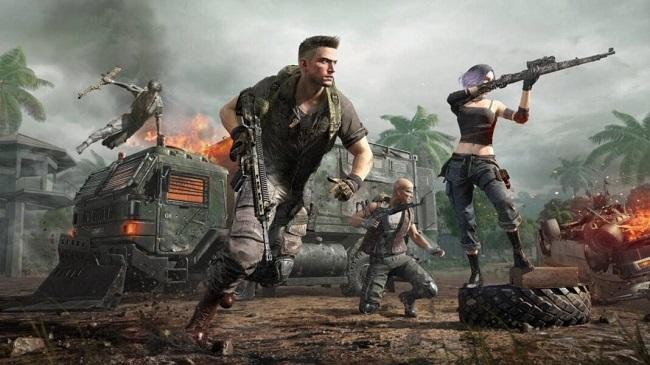
Do you know what the most popular and captivating game that has drawn players from all around the world? It is, in fact, PlayerUnknown’s Battlegrounds, or PUBG. Game enthusiasts see PUBG as a blessing because it is special and fun.
The game’s exceptional graphics and well-organized game mode have helped it gain a large number of users in a short period of time. Everybody has been enthralled by the game, from young children to adults.

Teenagers are known to adore this game. Only a small number of users/players of this game had specific errors, such as installation and steaming errors, failed to initialise steam, etc.
While playing the game, these mistakes caused a lot of difficulties. As a result, they were unable to participate in the game. In this world, nothing can function flawlessly; every programme must encounter some faults. The PUBG video game also fits this description.
These mistakes invariably destroy enjoyable games. There is still a solution to fix any issue, so try not to get frustrated. The initialization error can be caused by a variety of factors. But we can fix those mistakes. The best ways to deal with this fail to initialise problem are described below.
Contents
PUBG Failed to Initialize Error Causes
The major cause of the PUBG Failed to Initialize problem is incorrect PUBG game programme installation. The permission you granted to the game files, out-of-date graphics drivers, and in a very rare instance, a malfunctioning version of Steam, are just a few of the other causes. By selecting the most appropriate solution from this tutorial, you may get rid of this unpleasant issue.
PUBG Unable to Initialise Steam Error: How to Fix
Solution 1: Verifying game integrity
The broken or corrupted game files are to blame for the PUBG’s failure to initialise Steam problem. You can quickly verify your game files on Steam if they are corrupted or damaged. Please follow the steps below to verify:
Step 1: Open “Steam” and choose the “Library” area as your first and most important action.
Step 2: Navigate to “PUBG”. Click “Properties” from the drop-down menu that appears when you right-click on it.
Step 3: To check the integrity of the PUBG game files, select the “Local Files” tab and then “Verify Integrity of Game Files.”
Step 4: Allow it to finish verifying the files.
Step 5: Try to run your game after the verification process is complete.
Please attempt the other techniques listed in this manual if the issue persists.
Solution 2: Turn off Your Game’s Full-Screen Optimizations.
Occasionally Fails to Initialize Due to the “Fullscreen Optimization” function, a game fault has occurred. The purpose of this feature in Windows 10 is to improve gaming performance. Therefore, this functionality can unintentionally cause stability problems. Disable this functionality first, then see if the problem has been resolved. To turn off the “Fullscreen Optimization” option, follow these instructions:
Step 1: To launch File Explorer, simultaneously press the Windows key and the letter E on your keyboard. Now navigate to the folder in which Steam is installed. The majority of the time, it will be installed under C: Program Files(x86) or C: Program FilesSteam. Then, navigate to
steamapps\common\TslGame\Binaries\Win64\
Step 2: Right-click “TslGame” or “TslGame.exe”.
Step 3: Choose “Properties” from the drop-down menu.
Step 4: Select the “Compatibility” tab at this point. Verify that the checkbox for “Disable fullscreen Optimization” is selected. To submit, click the “Ok” button.
Step 5: Play your game after completing the previous steps to see if the error has been fixed.
This approach must correct the problem. If not, proceed to the next strategy.
Solution 3: Restart your Steam Client.
This issue could appear at random because of the steam. The Steam-related problem can be easily fixed. You must carry out the following actions:
Step 1: Stop playing the game you’re playing right now.
Step 2: Launch “Task Manager” by performing a right-click on the taskbar or by pressing the Windows Key and E on your keyboard.
Step 3: Locate and choose the “Processes” tab.
Step 4: Look for any instances of the “Steam and TsIGame” process. Stop any such process if you encounter it.
Step 5: Restart Steam to complete the process. Open the game again to see if the issue has been fixed.
Restart or reboot your computer if the aforementioned fix does not work.
If restarting your computer did not solve the issue, move on to the next suggestion.
Solution 4: Turn off Steam’s Administrative Power
For many customers, fixing the Steam administrative power issue has fixed the issue. This approach is among the most successful ones. To remove the administrative power, follow these instructions:
Step 1: Go to the folder where Steam is installed. Most of the time, Steam is installed by default under C:Program Files(x86). Steam or Steam in C: Program Files
Step 2: Navigate to TslGameBinariesWin64 in Steam Apps.
Step 3: Look for the “Tslgame.exe” file. When you do a right-click on the file, choose “Properties.”
Step 4: Navigate to the “Compatibility” tab and uncheck the “Run as Administrator” box.
Run your game in Step 5 to verify that the bug has been fixed.
Solution 6: Run Steam as Administrator.
When you run it in Administrator mode, the most of the problems will be fixed. Try starting the Steam client with Administrator rights as a result. The Steam client should be in Administrator mode.
Step 1: To launch “File Explorer,” press Windows Key and E simultaneously on the keyboard.
Step 2: Go to the location where Steam is installed. It can be located under C:Program Files (x86)Steam or C:Program Files (x86)Steam by default in Windows.
Step 3: At this point, you must right-click on Steam (or Steam.exe). Choose “Run as Administrator” from the menu.
Step 4: Finally, launch your game to see if the issue has been resolved.
The majority of customers who had the PUBG fail to initialise Steam error reported that this solution was helpful in fixing the bug.
Solution 6: Update Graphics Drivers
We occasionally could be unaware of our obsolete drivers. This issue is also brought on by these obsolete drivers. You should constantly check for fresh updates from your graphic card maker to update your graphics card in order to fix this issue (it can be AMD or Nvidia). Update the outdated drivers using these steps:
Step 1: Right-click the “My Computer” icon that is visible on the desktop. From the drop-down menu, select “Device Manager”.
Step 2: Continue to the “Display Adapters” section now. Next, right-click on your “Graphics Card” by going there.
Step 3: From the menu that appears, choose “Update Driver Software.”
Step 4: Click the “Search automatically for updated driver software” option that appears.
After completing the aforementioned procedures, your drivers will be updated. If they haven’t been updated, you may quickly update them by downloading and installing the most recent drivers from the manufacturer’s website.
7: Option: Reinstall Steam
Before using this approach, try the aforementioned solutions first. This approach would presumably fix the problem if none of the above approaches did. It’s quite simple to use this technique. The programme must be downloaded and installed from the Steam website.
Step 1: On your keyboard, simultaneously hit the Windows Key and R buttons. You’ll see a dialogue window. Enter “appwiz.cpl” into it after feeding it.
Step 2: Look for Steam’s entry in “Application Manager.” Click “Uninstall” from the context menu when you right-click “Steam.” (Steam’s directory can also be used to perform the uninstallation.)
Step 3: Restart your computer and install the most recent “Steam” version.
Solution 8: Turn off any Windows Firewall and/or Antivirus Software
This is thought to be one of the least likely causes of the PUBG unable to initialise Steam issue during gaming. In any case, it is preferable to try this approach after considering the aforementioned solutions. To turn off Windows’ firewall or antivirus software:
Step 1: Type “Control Panel” into the search box to launch it.
Step 2: Find and select the “Windows Defender Firewall” option.
Step 3: Select “Windows Firewall” from the menu, then turn off the firewall feature for your game.
Conclusion
Your game will now function flawlessly and without any bugs. The eight techniques listed above are therefore the most effective ways to resolve the PUBG failed to initialise Steam issue.
Before attempting any procedure, it is usually advisable to read the entire text and the instructions. Keep an eye out for a better solution to the game’s fault.
Before putting the steps into practise, make sure to read them all. These fixes should eliminate the issue and allow you to continue playing your game uninterrupted. Never give up hope and get in touch with PUBG support if the issue persists. Enjoy Your Game!


![DNS_Probe_Finished_No_Internet Error [RESOLVED] Fix DNS_Probe_Finished_No_Internet Error](https://howandwow.info/wp-content/uploads/2019/09/Fix-DNS_Probe_Finished_No_Internet-Error.jpg)
![Err_Connection_Reset Error in Chrome [RESOLVED] Fix Err_Connection_Reset Error in Google Chrome](https://howandwow.info/wp-content/uploads/2019/09/Fix-Err_Connection_Reset-Error-in-Google-Chrome.jpg)
![Err_Cache_Miss in Google Chrome Error [RESOLVED] Err_Cache_Miss in Google Chrome Error](https://howandwow.info/wp-content/uploads/2019/08/How-to-Fix-Confirm-Form-Resubmission-Error.jpg)


![Steam Missing File Privileges Error [RESOLVED] How to Fix Steam Missing File Privileges](https://howandwow.info/wp-content/uploads/2020/07/How-to-Fix-Steam-Missing-File-Privileges-Error-100x70.jpg)
![SIM Not Provisioned MM#2 Error [RESOLVED] SIM Not Provisioned MM#2](https://howandwow.info/wp-content/uploads/2020/03/SIM-Not-Provisioned-MM2.jpg)


