Data Error Cyclic Redundancy Check error arises when you transfer some important data from one drive to another, and your screen flashes with saying “Data ERROR”. At this point, you get acquainted with many questions like why it failed? And how do I resolve it?
Well, you are landed on a helpful page. Through the end of this article, I assure you that you will be capable of solving your problem with the methods stated below.
Moreover, to overcome this issue, firstly, you must repair the hard drive by running the CHKDSK command via command prompt.
CHKDSK command would help in checking the integrity of your hard drive to diagnose logical file system errors, mal-functioned sectors, and file system metadata.
Read Also:
Contents
How to Fix Data Error (Cyclic Redundancy Check) in Windows 7, 8 and 10
The Cyclic Redundancy Check(CRC) is generally a method of verification of data that the computer uses to check the accurate data on the disks. Also, CRC recognizes accidental changes done on raw data inside the storage media.
The Data Error Cyclic Redundancy Check happens because of disc drive corruption, misconfigured files, written account file corruption, littered disk, unsuccessful program installation, or once there’s a nasty spot on the media.
Despite a selected cause, the Data Error Cyclic Redundancy Check may be a serious issue that has to be resolved as shortly as doable to avoid system failure and, most significantly, data loss. Most Probably, there can be few other options that can also help solve such type of issue.
We have listed some of them below, and the most recommended are following the sub-topic
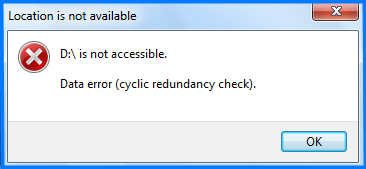
1. Accessibility of Drive data error(Cyclic Redundancy Check)
2. Data Corruption Error message in Outlook due to corrupt folder(.pst).
3. CRC issue on an optical disc(such as CD, DVD, etc.)
In Particular, If you get this Data Error while surfing with files due to transferring from one drive to another, here are few essentials you will have to recover.
Method 1: Recover the Sources Files
There are many resources on the internet available for Data Recovery Software. Following paid software, there is also some free trial or free.
When you delete or move or write a file from any device, the special hidden file that contains information concerning the files and folders merely deletes its entry, not utterly removing each computer memory unit of the file.
The Recovery computer code makes use of this and rebuilds the information file, creating the deleted or corrupted file out there once more, and you’ll be able to copy files currently while not the info Error Cyclic Redundancy Check message.
Steps to recover files employing recovery software:
Step 1: Initially, stop all the currently running programs.
Step 2: Currently, run the package as administrator (Right-click on the package icon within the begin menu or on the Desktop and opt for Run as Administrator from the Context Menu).
Step 3: Choose the Drive you wish to recover files from and choose file sorts if you’re planning to recover the precise variety of files like pictures, audio, documents, etc.
Step 4: Like better to begin sick when setting the destination (where to avoid wasting the recovered files). And you’re set.
Furthermore research, it is also found that the Run SFC Scan tool would also be helpful. SFC stands for System File Checker, which is employed to repair Windows system files together with Windows DLL files, register files, or alternative protected files.
Typically because of a corrupt classification system or register files, as mentioned higher than, Data Error Cyclic Redundancy Check happens. The SFC scan finds the file issue and replaces the corrupt or broken file with a replacement one.
The complete method will take around five to twenty minutes relying upon the size and volume of the file. Required Steps to run SFC scan:
Step 1: Connect the storage drive
Step 2: Choose the Windows icon to open the search bar.
Step 3: Type cmd. Right-click on ‘Command Prompt‘ and choose ‘Run as Administrator‘ from the choices.
Step 4: Type SFC/scannow within the cmd window and hit the ‘Enter‘ button to run the SFC scan.
After the SFC scan is finished, restart the system and take a look at accessing the files from the storage media.
Method 2 – Repairing the Whole Drive
Command Prompt can be useful to repair the drive. To solve Data Error Cyclic Redundancy Check, you need to repair the disc drive by running the CHKDSK utility via electronic communication.
CHKDSK checks the integrity of your disc drive and fixes logical classification system errors, unhealthy sectors & classification system data. You’ll be able to run CHKDSK by following these steps:
Step 1: Connect the device to your laptop.
Step 2: Press ‘Windows+Q‘ and sort CMD within the search bar.
Step 3: Right-click on the ‘Command Prompt‘ and choose the option ‘Run as Administrator‘.
Step 4: An electronic communication window seems. Sort chkdsk X: /f wherever X is that the disc drive or the other media device letter connected to your system. or else, you’ll be able to sort chkdsk X: /F /X /R for the rigorous scanning and repairing.
Step 5: Hit the ‘Enter‘ button and wait till ‘chkdsk‘ utility repairs the disk errors.
After CHKDSK completes error checking, re-connect storage media to the system to access it from File somebody. If you’re able to access information|the info|the information} with no error; directly copy data from it to a secure location on your system and format the disc drive or the other storage media via Disk Management tool or DiskPart.
NOTE: If the matter persists, you wish to format your storage drive. The format can erase all the info from the device. If you don’t need to lose knowledge, you need to follow the last answer given during this post, which is more practical and best.
Method 3 – FORMAT the Corrupted Drive
Besides repairing the drive, you can also consider formatting the drive. Also, formatting the drive is much easier than repairing it. Back up your data which you want to save as Formatting will erase all your data.
How to Format A Drive in Windows
Step 1: Firstly, plug your drive into the PC and, if necessary, into a wall outlet.
Step 2: Open File Explorer and locate your drive within the sidebar.
Step 3: Right-click on the drive and click on the Format option.
Step 4: Under the filing system, choose the filing system you would like to use. See the above section for more details on which one to select.
Step 5: Give your drive a reputation under Volume Label and check the fast Format box.
Step 6: Click Start to format the drive. After that, you’ll get a notification (it should only take a couple of seconds).
How to Format A Drive in macOS
Step 1: Perform: Open Finder > Applications > Utilities (shortcut Shift + Command + U) and click twice on Disk Utility.
Step 2: Select the drive you wish to reformat within the left-hand sidebar and head to the Erase tab.
Step 3: Under the Format menu, opt for the filing system you wish to use. See the higher than the section for a lot of details on that one to choose.
Step 4: Give your drive a reputation and click on the Erase button. It ought to solely take a number of seconds to format your drive.
Method 4 – Renaming the Drive (Assigning a drive letter) if a Drive is Not Accessible
In some cases, windows OS doesn’t mechanically assign a drive letter to a recently connected drive or de-assigns it for safe disconnection once idle. If that’s the explanation the drive wasn’t accessible, you’ll rename or assign a drive letter to the drive to access it.
Required steps to allot a drive letter to a drive or a partition in Windows:
Step 1: Hold the keys Windows + R to open the run… dialogue box.
Step 2: Sort “diskmgmt.msc” within the text box provided while not the quotes and press the Enter key.
Step 3: Disk management tool window can open if you see the drive you would like to assign the letter to; right-click on that. You’ll determine different drives from their sizes or file systems.
Step 4: Within the menu that pops up, choose modification drive letters or ways.
Step 5: If there’s any drive letter associated already, choose to modification or choose to add if there was none.
Step 6: Assign a brand new letter to the drive, ignore any warnings if something pops up.
Step 7: Shut the windows and resuscitate.
See if this alteration in the drive letter allowed you to access the drive and removed the message knowledge Data Error Cyclic Redundancy Check.
Method 5 – Check for Bad Sectors on a Hard Disk
There are many methods for locating and correcting BAD sectors.
Step 1: Use the Error Checking utility inbuilt to Microsoft Windows.
Step 2: Double Click (My) Computer, the disc.
Step 3: On the shortcut menu, click Properties and the Tools tab within the Properties window.
Step 4: Click Check NOW within the Error-Checking standing space.
Step 5: In the Check Disk window, choose the mechanically Fix classification system Errors check box, choose the Scan For And try Recovery Of BAD Sectors check box, and so click begin.
Use SeaTools nosology for Seagate and Maxtor drives and run a protracted take a look at. For Seagate interface drives, use Seatools Enterprise.
Method 6 – Using a Data Recovery Tool {Suggested}
If none of the higher than listed solutions works for you then, This tool will assist you to recover knowledge from a severely corrupt, formatted, re-formatted, inaccessible Winchester drive, and lost or deleted Winchester drive partitions with some easy clicks.
Step 1: Connect the storage drive to the computer via a USB port. If you’re prompted to ‘Format laborious Drive‘ on a message box, click ‘No’.
Step 2: Launch the code.
Step 3: Check the ‘All Data’ checkbox to pick and recover drive files, folders, and alternative deleted knowledge from the external Winchester drive. You’ll conjointly check individual boxes.
Step 4: Click the ‘Next’ button, and so select the connected storage drive.
Step 5: Turn on ‘Deep Scan’. The Deep Scan choice takes longer because it totally searches for the deleted knowledge deep within the Winchester drive supported file signatures, and it conjointly facilitates recovery of data.
Step 6: If you wish to recover drive knowledge from deleted, inaccessible, or un-allocated partition, choose ‘Can’t notice Drive’ beneath alternative Locations and click on the ‘Scan’ button.
Step 7: On the subsequent screen, choose your drive and click on the ‘Search’ button. All deleted partitions are listed beneath the ‘Partitions Found’ box.
Step 8: Select the partition and click on the ‘Scan’ button to start out scanning. If nothing is found, click on the ‘Deep Scan’ link at rock bottom to start Deep Scan.
Step 9: In the left Tree read pane, you’ll see all the recovered files and folders. Click on the ‘File Type’ tab to look at files isolated by sort. You’ll conjointly click on a file to preview it before you start the recovery.
Step 10: Check the checkboxes of knowledge that you need to recover and click the ‘Recover’ button.
Step 11: Click the ‘Browse‘ button to pick the situation wherever you wish to save lots of the recovered knowledge. Certify not to choose a similar drive.
Step 12: Click the ‘Start Saving’ button.
The selected recovered files and folders are saved at the required location.
Read Also:
Conclusion
To neglect the Data error (cyclic redundancy check), schedule weekly or monthly defragmentation tasks in Windows. Also, run CHKDSK monthly to keep your magnetic disk healthy and free from errors as well as unhealthy sectors.
If you ever face the Data Error Cyclic Redundancy Check, stop mistreatment the system and check out to resolve the error as shortly as attainable. The error will cause abundant larger issues anon, as well as the loss of your precious information.


