We know how annoying these Windows updates are, recurring prompts about features and stuff and not understanding that you don’t need the update, we all have been through it. Even after responding to these prompts and you finally make up your mind to update, a new error pops out which makes things even worse.
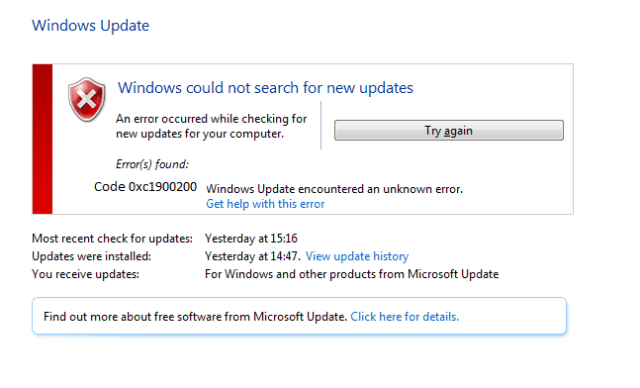
This is exactly what we are going to talk about in this article. This error usually occurs when your installation for a new update is almost done, say 99% and for no reason, a prompt appears saying that the update couldn’t be completed without adding further information.
Sit back and go through this article which sure is gonna fix your problem in no time. Before going for fixes, let us see what is actually causing the error:
Contents
What Causes the 0xc1900200 Error?
The usual take about this error is that the system on which the update is being made does not meet the minimum requirements meaning that maybe your system is a little bit back-dated or maybe the CPU speed or the available Ram or free disk space aren’t good enough for the update.
Next on the list would be an error with your Windows update components, the Windows update components are a utility of the Windows OS for the sole purpose of updating procedure, unfortunately, these are software components so it is prone to have occasional glitches, it requires constant troubleshooting to keep it in a good condition.
Insufficient partition space: When you install Windows 10 or Windows 8/7 on a clean formatted disk, it first creates a partition on the disk at the beginning of the hard disk. This partition is called the System Reserved Partition.
Read Also:
Thereafter it uses the balance unallocated disk space to create your system drive and install the operating system. In simple language, this space is used for data swapping, and with time this space gets clogged with insufficient data.
Thus making space unavailable for the OS to be updated which results in the error If the diagnosis confirms this is the actual cause of the error then you can use a utility that would enlarge space, there are various utilities available over the web for the sole purpose of increasing partition space.
System File Corruption: Every now and then files in our system get corrupted due to numerous reasons like a bug or virus that can be causing the files to be corrupted.
In this case, a file that is necessary for the OS to be updated may have gotten corrupted, in which case making the file completely unusable and inoperable, it is not possible to backtrack the cause of the file being corrupted instead we can fix it easily, whenever a file is corrupted the first thing you can do is to use your system tools to fix it, or you can repair it by reinstalling or refreshing it.
This is just in addition to the previous claim, the reason behind Windows update failure can be also the missing of system files like DLL files, EXE files, sys files, etc. There are thousands of tiny system files that work on specific tasks.
If one of the files gets replaced, deleted, or damaged then you may face the Windows update error 0xc1900200.
How to Fix 0xc1900200 Error in Windows 10
Now that the possible causes of the error 0xc1900200 have been discussed let’s not waste time and quickly move to the solutions
Method 1: Verifying The Minimum Requirement of The System For The Update
As mentioned prior maybe your system is just not compatible with the latest update, to verify this go to the official website of Microsoft.
Step 1: When the webpage interface opens you’ll find a highlighted button saying “Get anniversary update now”, click on it and a file will start to download.
Step 2: Wait for a while, run the program after the downloading is complete which will trigger your update assistant to open up, in this interface, you’ll find the button “update now”click this button.
Step 3: Just after clicking the button, you’ll be provided with a compatibility report, the incompatible components will be visible to you and if all the checkmarks are green then your system is compatible with Windows 10.
Step 4: If not there is not a problem lying it is just your PC is outdated. But it is safe to say that your system is compatible if the compatibility report is positive then here lies some other reason causing the error. so let’s move to the next fix.
Method 2: Resetting The WU Component Through An Automated Agent or Through an Elevated CMD Window
Before resetting the WU component it is convenient to use a simpler method to fix the issue with the Windows update service, this can be done with the help of Windows update troubleshooter tool:
Step 1: Download the Windows update troubleshooter tool from the official website for your Windows version.
Step 2: Run the troubleshooter tool to scan your system and fix automatic errors regarding Windows updates.
Step 3: No external command is required after the program fixes the error simply restart your system and check if the fix has worked.
If not we can go for resetting WU components which is discussed below;
There are two ways of resetting the Windows update component, the second one being a little bit tricky, let’s start with the easy one.
There is a gallery of scripts available for resetting the WU component, open your default browser and go straight to the Microsoft tech page. The script available here is universal and can go with all versions of Windows.
Step 1: Download the zip which is also known as the reset Windows update agent script.
Step 2: Wait till the download is completed and now extract the files to a folder.
Step 3: Find the file exe and click on it which will run the script. There are other files like ResetWUEng.cmd but you have to go through a whole set of manual instructions so it is better to let the script automatically reset the WU component.
Keep in mind to turn down other functions going on in the background because this script is going to reset all the components, running other files can again result in corrupted inoperable files.
Step 4: After the script has completed its work restart the PC, try the updating procedure and see if the fix has worked.
If the issue persists then we have to do this resetting manually using the command prompt (CMD), which brings up the next option.
Resetting Through an Elevated CMD Window:
The elevated CMD window allows you to execute commands with administrative privileges.
Step 1: Click Start and type cmd in the search box provided, hit enter.
Step 2: Right-click on the cmd.exe and choose “run as an administrator” which will open up the user account control window.
Step 3: Click yes to run the Windows command prompt as an administrator.
Once inside the CMD interface, type in the following commands;
net stop wuauserv
net stop crypt
Svcnet stop bits
net stop msiserver
Step 4: These are commands to stop some Windows update services, after which you have to type in the below commands again in the interface.
ren C:\Windows\SoftwareDistribution SoftwareDistribution.old
ren C:\Windows\System32\catroot2 Catroot2.old
After entering each command hit enter to rename the software distribution in an attempt to terminate errors in the OS component.
Step 5: Now we are going to enable the services that we disabled priorly and we are going to do exactly what we did to disable them. so again type in the commands in order
net stop wuauserv
net stop crypt
Svcnet stop bits
net stop msiserver
This will enable this WU service, now we are one step away from fixing the error.
Step 6: Restart your PC, wait for a while let the system reach its optimal state, and now try resuming the updating procedure, if the error prompt still shows up, let’s move on to the next solution.
Method 3: Expanding The Reserved Partition
As explained in the reasons unavailability of partition space can be the problem, so to expand it we have to use a third-party tool, it is because it can’t be done using disk management.
If you try to do it with the disk management console you’ll find that the option extend has been grayed out stopping you from further proceeding, it is easy to find a third-party tool, we have a tool in handy called AOMEI partition assistant which can help you to do so.
Step 1: Download the freeware from a trusted website and install it.
Step 2: Right-click on the redundant partition where you’ll find the option Resize partition, click on it, it would almost need 400 MB to do so, select a drive say you selected drive C.
Step 3: An interface will pop out named “move and resize partition”, tick the checkbox ” I need to move this partition”, if you want to select space, you’ll find an option to do so, after that click
Step 4: In the main interface now you ll find the allocated space after the system reserved partition and before drive C.
Step 5: Now again right-click on the system reserved partition and select Resize partition.
Step 6: In the pop-out window, drag the slider bar rightward to extend System Reserved into unallocated space, now click OK to return to the main interface.
Step 7: Click apply in the next interface which would be the main interface and now the program would need a restart of your system in preOS mode.
After the system reboots try now updating the Windows and see if the error is still popping if so proceed through the next step.
Method 4: Perform a Repair Install
what do we do when repairing some components is not fixing your original error, simply we stop trying to find the designated area of problem and reset all the component to in an attempt to fix the problem, that’s what we are gonna do in this next section, if above methods don’t work, there may be an underlying issue with some of the Windows components, the best way to do this is a repair install.
This method is convenient as it won’t disturb your personal files, just make sure that you have enough disk space around 9 GB, make the media device or the ISO file handy. Follow the following steps now:
Step 1: Begin the repair installation by inserting the DVD or USB containing the files, or you can just click on the ISO image.
Step 2: When prompted “exe”, click start on it.
Step 3: Windows 10 Setup will start with the”Get important updates” We recommend selecting “Download and install updates” on this page”.
Step 4: You’ll be popped with a series of prompts, go through them and move further till you reach the last prompt saying “choose what to keep”
Step 5: This is a very important prompt and an inappropriate answer would result in loss of important data. Make sure to select the first option saying “Keep personal files, apps, and Windows settings”.
Step 6: Click next, your PC will reboot several times and it will be ready with the new Windows and also containing your personal data.
Read Also:
Conclusion
We are quite sure these fixes would work, go patiently through each step and in addition to reading steps also go through the prompts and instructions you have popped out in each interface, be patient while executing commands in CMD as those are specific commands and won’t work if you mistakenly change anything.
We wish best of luck and hope that this error will be fixed in no time.


